Showing posts with label Vegetarian. Show all posts

March 28, 2011

Balsamic Vinaigrette

Here's something with which to dress a salad...

This salad dressing is easy to make and tastes great. It adds a flavorful zing to a bowl of leafy greens.

The recipe calls for a half-teaspoon mixture of spices, allowing you to use the spices you like best. I've used dill weed, coriander, thyme, onion powder, and basil. Whatever you choose to include, the mixture should amount to about 1/2 teaspoon.

To mix and store the dressing, I use a well-washed bottle that originally contained enchilada sauce.

Balsamic Vinaigrette
Estimated preparation time: 10 minutes
Makes enough for about 6 side salads or 4 entree salads 

Ingredients:
  • 3 tablespoons balsamic vinegar
  • 1/4 teaspoon garlic salt (or plain salt)
  • 1/4 teaspoon granulated sugar
  • Dash of black pepper
  • 1/2 teaspoon total combination of dry spices like dill weed, ground coriander seed, thyme, basil, and onion powder (choose according to your taste)
  • 1/2 cup extra virgin olive oil 

Instructions:

1.  Measure ingredients into sealable jar or bottle. Seal securely.
2.  Shake well to combine ingredients.
3.  Add to salads and enjoy!
4.  Refrigerate unused portion. *Ingredients will separate; shake before each use.


Enjoy!

September 12, 2010

Yummy Oatmeal

I'm a huge fan of oatmeal... 

Sometimes I will even disrupt my obsession with Kashi Island Vanilla wheat cereal and eat hot oatmeal for breakfast during the summer months. Now that the outside temperature is cooling down, I'll be making oatmeal more often for breakfast.

The typical process:
Generally, I prepare an individual packet of maple-sugared oatmeal (or something similar--and I like the reduced sugar varieties that are around nowadays) and add some plain quick oats and extra milk or water. Then I toss in a couple dozen dried cranberries and microwave the whole deal. I have learned the sticky way that oatmeal expands quite a bit when microwaved. One must use caution.

The fancy method:
Sometimes I'll cook up some oatmeal the old-fashioned way using a stove and a pot. I'll use whatever variety of oats I've got, preferably something somewhat chopped, and doctor up the mixture with cinnamon, light brown sugar, vanilla, and dried fruits.

This savory, cinnamony, warm and yummy oatmeal creation has thrice graced my supper table in the past year. Who ever said oatmeal must be served only for breakfast?

Sugar...
Typically, I feel a twinge of guilt when I scoop out some *gasp* sugar to add to, well, anything. Then I look both ways before I dump in some more. Oatmeal is the chief offender--it doesn't really need sugar. But I really don't add that much sugar. It's just that sugar is discussed with such disdain when it comes to nutrition and health; thus, now that particular crystalline carbohydrate is oft-depicted as the nemesis of all those who endeavor to live healthily.

Moderation, people. That's the key. Fact is--we need sugar, and it isn't, or doesn't need to be, our downfall.

Math:
Curious to know just how much of that sweet stuff I've put into this recipe, I did a little calculating.
(Skip the following if you really don't care.)

Three tablespoons of light brown sugar contains 135 calories and 36 grams of carbohydrates (all sugar in this case). Divided into 4 servings, each serving contains 34 calories and 9 grams of carbohydrates (all sugar) from the light brown sugar. Additional calories and carbs (as well as protein, fiber, and vitamins) will come from the fruits and oats and milk, etc. I think--feel free to correct me--that 34 calories is about 15% of what one needs daily (for a 2000 calorie diet). Of course, we should limit our intake of those calories that come from simple carbs like sugar (as opposed to complex carbs found in whole grains and fruits).

Anyway, that amount works for me when I occasionally whip up this treat. One can certainly decrease or increase the brown sugar amount to suit one's own taste. Try cutting the sugar amount in half when you make the oatmeal, then add extra to your own bowl if you'd like more sweetener.

Whole grains:
And speaking (a while ago) of whole grains, I like that the oats contain no sodium or cholesterol and provide about 3 grams of fiber and 4 grams of protein per serving (4 servings)--about 12% and 9% of a typical daily requirement respectively.

Water and milk?
I recommend using a combination of water and milk for this recipe. I think the milk is a necessary ingredient for a creamier oatmeal. Use whatever ratio of water to milk that suits you, resulting in 2-1/2 cups of liquid total.

Dried fruits:
The dried fruits soften while they're cooked, adding hints of their flavors to the mixture. About 1/2 cup of fruits is sufficient. My staple dried fruit is cranberries. Apricots are also tasty--chop them into small pieces because they expand significantly when boiled. Other fruits to try are dried apples, cherries, raisins, or strawberries.

Naming...
Sometimes I struggle over what title to give a recipe--or really anything I'm labeling or naming. It needs to be just right. I'll usually start with some sort of filler name to give the post or essay or whatever-I'm-writing something resembling structure. I started this one with "Yummy Oatmeal," and I intended to change it to something more professional once I reached the end of this commentary. But, lo! it is yummy oatmeal, so "Yummy Oatmeal" is how it shall be forever henceforth named.

So, now, without (much) more discussion, here goes the recipe. It's really a simple thing--nothing that unique--but sometimes we just need an inspiration, right?

Yummy Oatmeal
Serves: 2 - 4
Estimated time: 20 minutes

Ingredients
  • 1/2 cup quick oats
  • 1/2 cup steel cut oats
  • 2-1/2 cups water and milk combined (making 2-1/2 cups total)
  • Dash of Morton's kosher salt (or another coarse salt) - optional
  • 1 teaspoon imitation vanilla extract
  • 1/4-1/2 teaspoon ground cinnamon
  • 3 tablespoons light brown sugar
  • 4 chopped dried apricots
  • 1/4 cup dried cranberries
Instructions
  1. In a medium saucepan, bring water, milk, and salt (optional) just to a boil over medium-high heat.
  2. Stir in the vanilla, cinnamon, quick oats, steel cut oats, light brown sugar, and dried fruits.
  3. Reduce heat to a simmer and cook for 5 - 7 minutes, stirring often.
  4. Remove pot from heat and let the oatmeal stand for one minute before serving.
  5. Serve with extra milk and/or sugar, if desired. 


Enjoy!

July 18, 2010

Easy Bean Spread

An easily-prepared lunch item or side dish...

Similar to my hummus recipe, the flavors of tahini and cumin make this a smooth, zesty food--quite flavorful. I really like it in a pita pocket for lunch. It's also tasty spread on crackers. It's great chilled or microwaved a bit.

This bean spread is easy to prepare: you just use a spatula to mash the beans some in between adding each other ingredient. By the time everything is in the bowl and combined, the mixture has a nicely spreadable texture.

Easy Bean Spread
Estimated time: 10 minutes
Serves: 2 - 4

Ingredients
  • 1 can (15-16 oz) black beans
  • 1 can (15-16 oz) great northern beans
  • 1 teaspoon minced garlic
  • 2 tablespoons tahini (sesame seed paste)
  • 2 teaspoons lemon juice
  • 2 teaspoons lime juice
  • 1/4 teaspoon freshly-ground black pepper
  • 1/2 teaspoon coarse salt
  • 1/2 teaspoon ground cumin
  • 2 teaspoons minced fresh cilantro
  • 1/4 teaspoon chili powder

Instructions

1. Drain the cans of beans. Discard the liquid. Gently rinse the beans, then transfer them to a large bowl.
2. With a rubber spatula, stir the beans to mix them.
3. Add the minced garlic. With the spatula, stir and smash the mixture until about half of the beans are mashed.
4. Stir in the tahini, and mash the mixture again with the spatula for a half-minute or so.
5. Add the lemon juice. Mash and stir.
6. Add the lime juice. Mash and stir.
7. Add the freshly-ground black pepper. Mash and stir.
8. Add the salt. Mash and stir.
9. Add the ground cumin. Stir and mash.
10. Add the fresh chopped cilantro. Stir and smash.
11. Stir in the chili powder. Mix and mash the mixture one last time.
12. Refrigerate. Serve chilled or heated. Serve in a pita pocket with spinach or sprouts, or serve as a spread on crackers.


Enjoy!

June 10, 2010

Basil and Cottage Cheese Pizza

Try this for your next pizza...

This pizza contains a blend of three cheeses: grated Parmesan, large curd cottage cheese, and shredded Mozzarella.

There's the wonderful flavor of fresh basil, melding with the tang of the tomatoes and the savory garlic.


There's no sauce, per se. Instead, the cottage cheese adds the necessary moisture and creaminess that's generally added by a tomato sauce or white pizza sauce. Cottage cheese, which is protein-rich and low in fat, also significantly enhances the texture and flavor of this atypical cheese pizza.


The taste is fantastic.

You can top essentially any pizza crust with this combination of toppings. Of course I think you should try making your own dough (see my easy pizza dough recipe).

Basil and Cottage Cheese Pizza
Estimated preparation time: 15 minutes + dough preparation (see recipe)
Baking time: 15 - 20 minutes
Serves: 4 - 6 (one pizza)

Ingredients
  • 1 large pizza crust (could use My Recipe)
  • 2 tablespoons salted butter
  • 2 teaspoons minced garlic
  • 1-2 medium tomatoes
  • 20-30 fresh basil leaves
  • Grated Parmesan cheese
  • Freshly-grated black pepper
  • 3 tablespoons crumbled feta cheese
  • 1 cup large curd low-fat or nonfat cottage cheese
  • Kosher salt
  • 1/4 cup onion, chopped
  • 2 cups shredded mozzarella cheese
Instructions

1. Begin preparing pizza dough according to my recipe or the package directions.
2. While the pizza dough is rising in the bowl (step #6 in my recipe), prepare the topping ingredients. Gather and rinse the basil, chop the onion, and slice the tomato and discard its seeds.
3. Lightly grease a pizza pan.
4. Preheat the oven to 450 degrees F (or temperature specified by dough/crust instructions). 
5. Spread pizza dough on greased pizza pan.
6. Melt butter and stir in the minced garlic.
7. Spoon the butter-garlic mixture on top of the dough, then use a silicone brush to spread it evenly across the dough, avoiding the edges.
8. Slice the fresh basil into approximate quarters or sixths, and sprinkle them over the pizza.
9. Lightly sprinkle on some Parmesan cheese.
10. Grate a light amount of black pepper over the pizza.
11. Add the feta cheese, crumbled evenly over the pizza.
12. Measure 1 cup of cottage cheese. Drop it by small spoonfuls around the pizza, avoiding the edges.
13. Sprinkle a pinch of salt and the chopped onions over top.
14. Arrange tomato slices on top of the pizza.
15. Spread the mozzarella cheese over the pizza.
16. Bake the pizza for 15-20 minutes on the middle oven rack. *Place a sheet of aluminum foil on a rack beneath the pizza to catch possible drips.
17. Allow pizza to cool for 2 minutes before slicing and serving.


Enjoy!

May 28, 2010

Baked Quinoa Burgers

Savory, chewy, protein-filled patties...

Think hashbrowns without the grease. Think hamburgers without the grill (a plus for those living where outdoor grills are verboten). Think summertime fare. Think about a zesty, flavor-filled lunch or dinner that fills you up because it isn't full of empty calories. Quinoa is good stuff

I created this recipe from my failed attempt at following another recipe for mini quinoa burgers. I misread some of the amounts and ended up with way more cooked quinoa than I was supposed to have (reminds me of a particular scene from I Love Lucy, only much less dramatic). So I decided to improvise, using all that quinoa and adding extra ingredients I pulled from the pantry, to make something more closely resembling the size of a hamburger.

Cool the quinoa: To cut down on the preparation time, you can cook the quinoa the day before you plan to make the burgers, and refrigerate it until you need it. Regardless of when you cook it, however, you will need to allow it some cooling time before you mix in the other ingredients. Since you'll be forming the patties by hand, the quinoa needs to be at least cool enough that you can touch it and, well, get it smeared all over your fingers, without that uncomfortable burning-skin sensation. I recommend cooking the quinoa first, then allowing it to cool while you cut up the scallions, preheat the oven, line and butter the cookie sheets, etc.

Cookie sheets: Both my cookie sheets won't fit side-by-side in my oven, so I had to bake the burgers in 2 batches. Many kudos to you if your cookie sheets are sized to fit on the same oven rack, side-by-side. One huge cookie sheet that would fit all 12 patties would, perhaps, be ideal ... 

Dill? I have a dill plant, so I used some of it in the recipe. You can buy dill in the grocery store, or you could use dried dill (use about 1/4 teaspoon). Alternatively, you could use fresh parsley or dried parsley.

Spices: I like the flavor that the chili powder adds to this dish, so I highly recommend it. You could mix it up, though, and use any other spicy spices that you like (cumin is a good option). There truly are a lot of flavors going on in those patties--from the spicy golden mustard, soy sauce, Worcestershire sauce......

Side ideas: Steamed corn or broccoli, salad, baked beans, tomato cucumber salad, corn on the cob.

Baked Quinoa Burgers
Estimated Time: 2 hours 15 minutes 
- Quinoa cooking: about 30 minutes
- Other prep: 1 hour
- Baking time: 45 minutes
Makes 12 Burgers

Ingredients
To make the quinoa:
  • 2 cups dry quinoa (about 6 cups cooked)
  • 1 tablespoon butter
  • 4 cups water or broth
To make the quinoa burgers:
  • 2 eggs
  • 1 tablespoon olive oil
  • 2 teaspoons soy sauce
  • 3 tablespoons Worcestershire sauce* (*omit for vegetarian version)
  • 2 tablespoons spicy brown mustard
  • 1/4 cup ketchup
  • 1 tablespoon minced garlic
  • 1/4 cup seasoned bread crumbs
  • 1/2 cup quick oats
  • 1/2 teaspoon chili powder
  • 4-5 scallions
  • 1 teaspoon fresh (or 1/4 teaspoon dry) dill or parsley, minced

Instructions
1. Cook the quinoa, following this recipe.
2. Cool the cooked quinoa while preparing other ingredients.
3. Position oven rack in middle of the oven. Preheat oven to 375 degrees.
4. Line 2 cookie sheets with foil, then coat the foil lightly with butter.
5. In a large bowl, lightly beat the eggs.
6. Stir in the Worcestershire sauce, oil, soy sauce, spicy golden mustard, and ketchup.
7. Thinly chop the scallions (discard wilted green parts and the root ends), mince the fresh dill, and set both aside.
8. Add cooled quinoa (cool enough to handle) to the large bowl.
9. Measure minced garlic, seasoned bread crumbs, quick oats, and chili powder, and add on top of quinoa. 10. Add the chopped scallions and minced dill.
11. With a large rubber spatula, mix all ingredients together thoroughly.
12. Measure out a 1/2 cup scoop of the mixture and form by hand into a patty that is 1/2" - 3/4" thick. Place on prepared cookie sheet. Repeat to make 12 patties (6 patties on each pan).
13. Bake on middle oven rack (bake in two batches if both pans won't fit at the same time) for 25 minutes.
14. Turn patties over (being careful not to rip the foil), and bake for 20 more minutes.
15. Enjoy plain or on a sandwich roll--with ketchup and a slice of ripe tomato, if you like.


Enjoy!

May 17, 2010

Pasta With Creamy Corn

Corn plus chicken broth and a tiny bit of cheese equals an excellent alternative to Alfredo sauce...

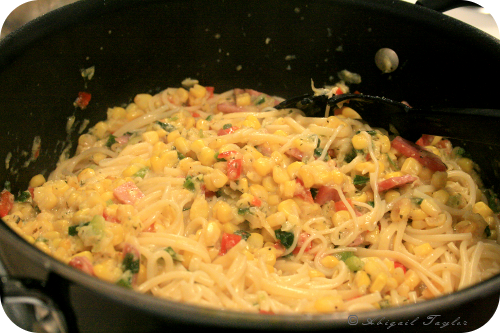
Use corn and chicken or vegetable stock to create a pasta sauce that is nutritious and delicious.

I got the idea for this type of sauce from a Rachael Ray Show episode. "Brilliant," I thought. So I decided to try something like it a few weeks ago. Such a tasty meal that was! And it's relatively simple to concoct. Don't let the long list of instructions in the recipe worry you. When I write the recipes I post, often I will go into the details of the process because I want it to be easy to follow for  readers, including those who don't often read recipes (there's a common lingo for typical recipes that isn't necessarily intuitive to everyone).

This meal consists of three main parts:
   1. Long pasta (fettuccine, linguine, or spaghetti).
   2. A corn-based creamy sauce.
   3. Vegetables and optional meat.
The supporting acts in this show are the herbs and a little bit of cheese.

Pasta: I recommend you avoid angel hair pasta because the sauce and vegetables will overwhelm such a thin pasta. Most other long (but thick/wide) pastas will work very well: I used a mix of linguine, fettuccine, and spaghetti because I only had small amounts of each. Substituting short-cut pastas like fusilli, orecchiette, farfalle, or another type that will hold the sauce and vegetables well would probably be a good variation. I have not yet tried that.

Sauce: The sauce includes two cups of frozen corn kernels and some chicken or vegetable stock--all whipped up in a blender until creamy. It's easy. Just be sure the blender lid is securely in place before you start the blender. I recommend covering it with your hand to hold it in place, just in case. (Note: I used 1 cube of chicken bouillon dissolved in 1 cup of water to make the broth.) Late in the making of this dish, you'll add 1/2 cup shredded mozzarella cheese. The cheese contributes just enough extra flavor and some added texture.

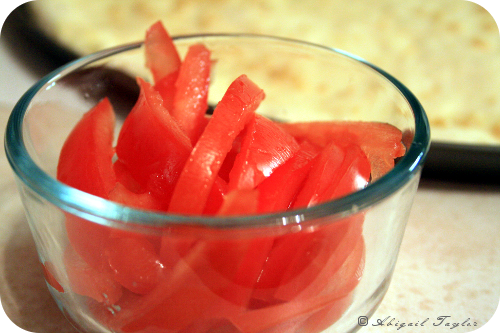
Vegetables: There are few limits to the types of vegetables that would do nicely in this dish. I used corn, scallions, and red bell pepper. That's simple enough (and there's a heap of flavor in just that combination). Other options include green bell pepper (or peppers that aren't so mild as bell peppers, if you'd like to heat things up a bit), carrots, red onion, peas, green beans, broccoli, or spinach. You can steam them (for instance, if you use peas or green beans) or saute them (chopped carrots, red onion, and spinach would do well sauteed) to soften them up nicely. Just watch the amounts you use, being sure that the ingredients will be sufficiently coated (to your taste) with the creamy corn sauce.

A note about the meat: I heated up some mini (3-inch diameter) round slices of ham--till they were lightly brown--then I chopped them up and added them to the sauce. I found this added a nice savory taste and pretty color to the dish. For a vegetarian version, though, you can certainly omit the ham (and use vegetable stock instead of chicken broth). If you want to make it extra meaty, you could use a mix of meats like cooked bacon (about 4 slices--discard the drippings, or reserve about one tablespoon as a substitute for the olive oil used for sauteing), browned ground beef (about 1/2 cup), cooked chicken (about 1/2 cup, shredded or cubed), Canadian bacon (about 5 slices), or even sliced sandwich meats (several thin slices can be heated, in a way similar to the instructions below). Or use just one meat from that list.

Spices and Herbs: This meal is surprisingly flavorful--the corn has such a nice, sweet, almost buttery flavor, and the scallions and peppers enhance the dish with their savory flavor and tangy sweetness. The three spices listed below blend together well. However, you can also experiment with other spices (in small amounts) like oregano, crushed red pepper flakes, cumin, or rosemary.

Side ideas: Garlic bread, steamed broccoli, or a salad.

Pasta With Creamy Corn
Estimated time: 45 minutes
Serves: 4

Ingredients:
  • 1/2 pound (about 2" diameter, held in a fist) long pasta (like linguine, fettuccine, or spaghetti)
  • 5 mini round ham slices (optional)
  • 1 cup chicken or vegetable stock (option: dissolve 1 chicken bouillon cube in 1 cup water)
  • 5 cups frozen corn kernels (about a 2-pound bag)
  • 1 tablespoon extra virgin olive oil
  • 1 bunch scallions (about 6 stalks) (note: scallions are sometimes called green onions)
  • 1/2 large red bell pepper
  • 1/4 teaspoon dried dill weed
  • 1/4 teaspoon dried thyme
  • 1/4 teaspoon dried basil
  • 1/2 cup shredded mozzarella cheese
  • Grated parmesan cheese
  • Salt and pepper
Instructions:

1. Place a large pot of water on medium-high heat to bring to a boil for cooking the pasta.
2. Meanwhile, heat the mini ham slices in another pot over medium heat for 3 minutes.
3. Turn over the ham slices, and cook them for another 3 minutes--or till slightly brown--then transfer them to a cutting board and remove the pot from the heat.
4. While the ham slices are cooking, measure the broth/stock and microwave it for 30 seconds. Having it warm is helpful when blending the frozen corn.
5. Pour 1/2 cup of warm broth into a blender. Add 2 cups of frozen corn kernels to the blender, then pour the remaining 1/2 cup of broth on top of the corn.
6. Blend the corn and broth until the mixture is creamy. Set aside.
7. Slice the scallions:
First: Cut off and discard the root ends, about 1 inch off the green ends, and any tough sections of the green stalks.
Second: Cut each stalk in two, separating the dark green, hollow section from the light green and white solid section.
Third: Thinly slice the scallions, cutting the hollow green sections slightly wider than the light green and white sections.
8. Chop the red bell pepper half into small chunks.
9. Return the large pot (used for the ham) to medium heat.
10. Add 1 tablespoon extra virgin olive oil to that pot.
11. Add the sliced scallions and red bell pepper and cook about 5 minutes, stirring often.
12. Add 3 cups frozen corn to the pot. Stir.
13. Stir in the dill weed, thyme, and basil. Cook over medium heat for about 10 minutes. The corn will brown somewhat. Stir frequently to prevent burning.
14. Meanwhile, once the pasta water reaches a boil, add the pasta and stir occasionally. Cook the pasta till al dente, then strain it, running it briefly under cold water (to prevent strands from sticking together). Set the strainer inside the pasta pot, if possible, and cover to retain some of the heat.
15. Cut up the browned ham slices and add the pieces to the pot with the vegetables after they have cooked for 10 minutes. Cook the mixture for another 5 minutes.
16. Stir in the pureed corn sauce. Bring to a simmer and cook for 1 minute.
17. Stir in 1/2 cup shredded mozzarella cheese.
18. Add the pasta. Turn off heat. Combine thoroughly with tongs or a pasta spoon.
19. Season the final product with salt and pepper, if desired, when it's on your plate. Top it with a sprinkling of grated Parmesan cheese.


Enjoy!